Friday, March 30, 2012

Westfalia Improvements - Part III

As I've previously mentioned, the Vanagon Westfalia camper conversion is very space efficient.  Sometimes too much so.  So much uitility is packed into a small space that one function can sometimes infringe upon another.

A small forward and larger rear table are ingeniously mounted in a manner that allows them to swivel into place, then stow without removing.  Westly's front table was missing when he rolled into my life and as it didn't seem all that useful, I've never replaced it.

The rear table though is much in demand for food preparation and serving, coloring books, map reading, perusal of the Bentley Manual, etc.   Two locking knobs (In Westly's case two metal rods welded on) allow the table to be locked into a multitude of handy positions.  The table stows nicely out of the way of the seat / bed, but  in doing so blocks access to two storage lockers and the hanging closet.

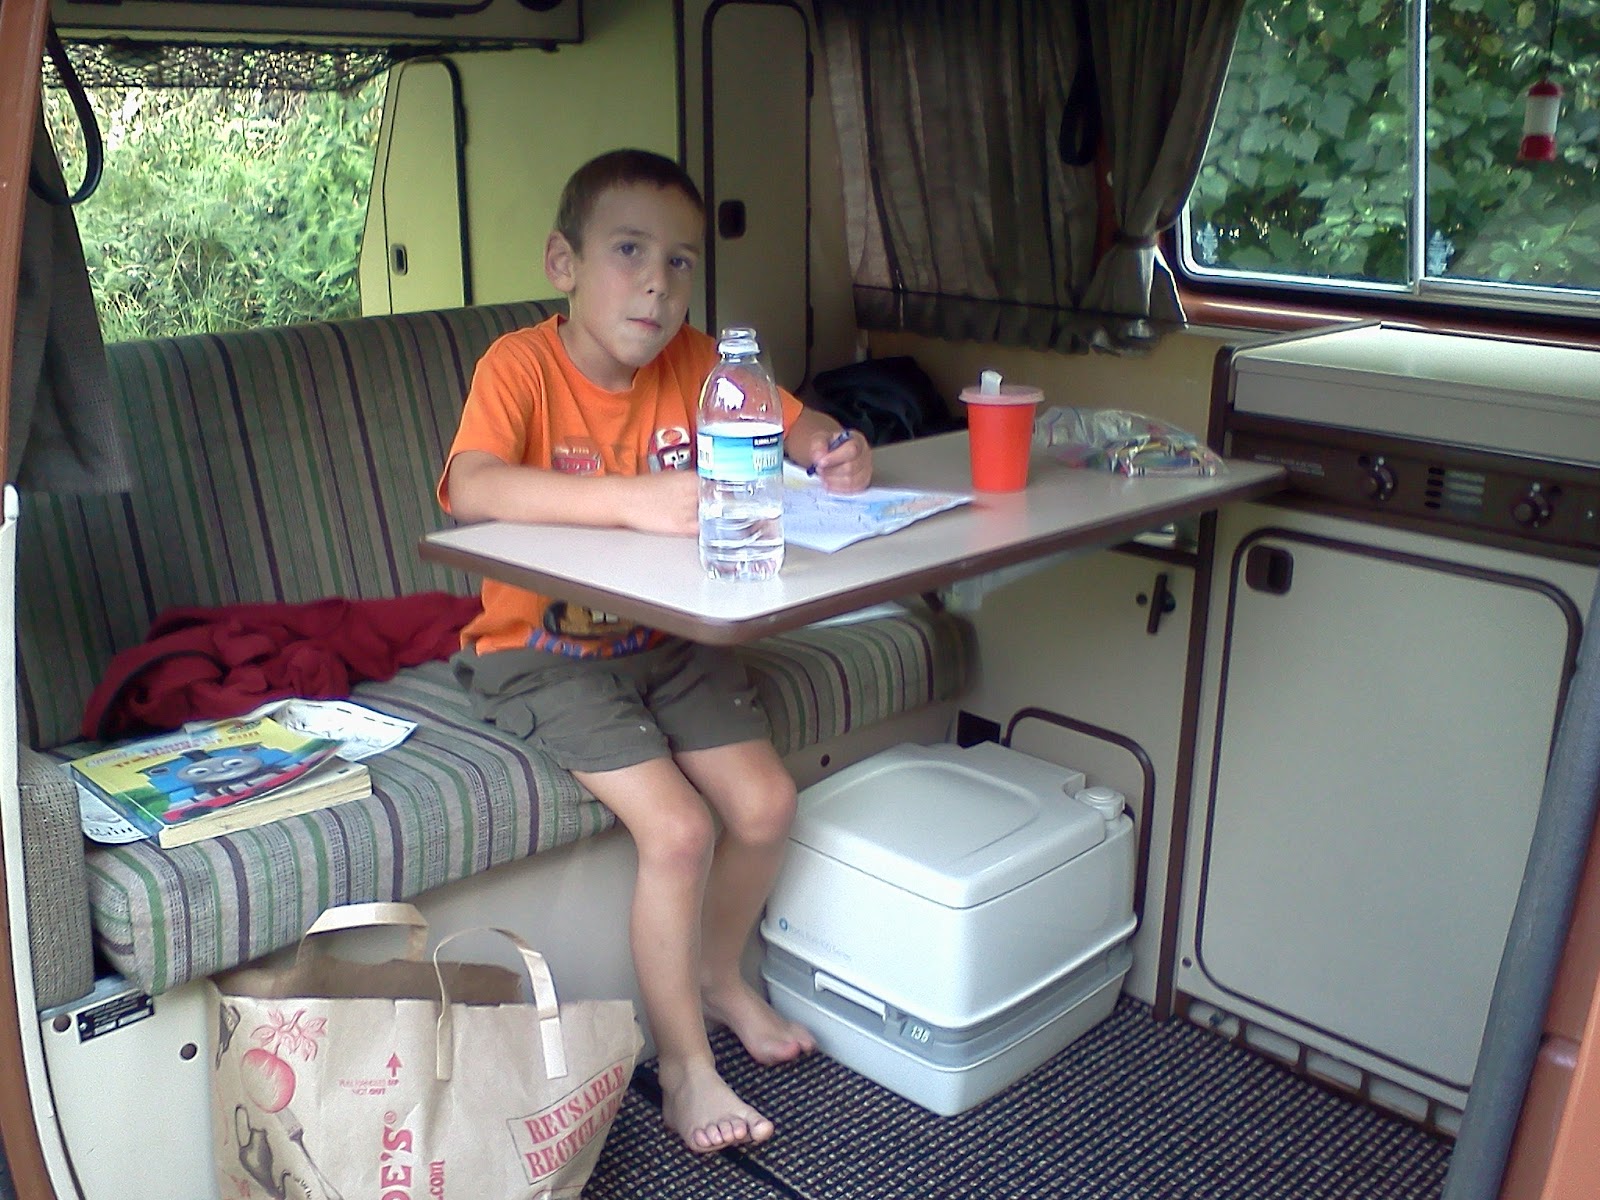
Van Kid munches on snacks and colors a treasure map at the table
The rear table stowed  - out of the way, but limited access to cabinets
Access to the closet involves cutting the lower part of the door just below the hinge and permanently attaching it to the opening.  I never use the closet that much, so haven't done this.  But Van Kid keeps his clothes and other stuff he can't leave home without in the lockers, so I began to cast about for a solution.  I noticed some Westy owners had modified their tables to be height adjustable and after considering the different ways they accomplished this, I set about shamelessly copying their clever ideas.

Rear Table Height Adjuster

I went to my local home improvement store and purchased a 3/4" X 24" galvanized pipe, a 3/4" PVC box adapter and a 3/4" PVC union.  I cut the pipe to 22"  leaving the orange plastic thread protector on one end.  Then I removed the table swivel base and used a cut-off wheel to detach the original galvanized stub.

Trimmed pipe with the union jammed into one end
The box adapter goes in the hole in the swivel base
The box adapter went into the hole in the swivel base from below, then I bolted the base back in place.  I jammed the union into the end of the pipe with a mallet, then put the pipe down through the table leg hole where the union slipped into the box adapter.

How it all fits together
Swivel base bolted back into place with pipe dropped in
The pipe with plastic sleeve pokes through here
The table legs slips right over it and down to the base
The table leg went back in the hole over the new pipe which is just the right size to fit snugly inside it.  The orange plastic thread protector gives it just enough tension to slide smoothly and eliminate rattles.  Now the table can be raised to any position and locked in place while retaining it's swivel function.  A higher table elevation comes in handy when the pop-top is up and tasks such as cooking are being performed while standing.  And it can be used as a night stand for the top bunk. Parts were about $10.

Raised position allows access to lockers
Outside Table Mount

While I was poking around online finding information about table height adjustment, I came across a thread where cunning Westy owners had made a bracket to mount the table outdoors, using the jack point on the side of the van.  At least one vendor sells this ready-made and it looks real slick, but as usual, I had my own ideas. Gathering some leftover odds and ends from around my shop, I put this together:

What is this thing and why is it in my Westy??
The rear table sets on a adjustable rod
Higher for cooking
It will raise another 11 inches if necessary
Lower for dining
(camping scenes simulated for illustrative purposes)
Pipe fits into jack point, hitch pin holds it in place
Here's what I used:  21.5  inches of 1.5" ABS pipe cut to 12" and 9.5"
                               1.5" X 3/4" PVC T fitting / threaded in the 3/4 opening
                                3/4" X 18" galvanized pipe (leave the orange cap on one end)
                                Suprotek PC-110 rebar pad (the foot)
                                Structron Super Handle - shortened to 23"
                                1/4" X 1-3/4" cotter-less (spring loaded ball) hitch pin
                             
The Super Handle is a telescoping fiberglass pole used by painters and janitors. You twist the two parts in opposite directions to loosen, then the inner part can be raised or lowered.  The threaded end where a brush or broom was intended to be attached is just the right size for the Westy table to rest on.  To trim it to size requires taking it apart and cutting the two parts individually.  When I had the size correct, I epoxied it into the upper (longer) ABS tube.  The two ABS tubes were then attached to the T fitting ( I didn't glue them in so I could break it down for more compact storage), the galvanized pipe was drilled to accept the hitch pin (just inside the jack point opening - see picture).  The rebar foot needed a little sanding to press-fit inside the lower ABS tube.

The foot is not adjustable, as it is on the slick vendor version.  For uneven ground, a rock or stick wedged under the foot will suffice.  The stand flexes a little when people are stepping into and out of the van, but not enough to worry about.  The tire jack can be put in place on the opposite side to stabilize ( BTW - this is also a useful trick to stabilize the van in strong winds or when lots of motion is taking place inside).

After I made this, I saw a jack that was modified with a tube and locking knob on the side so the table and it's leg can be set into it.  Great idea - you're already carrying around the jack in case of a flat tire, and now it has an additional use. I'll try this sometime.

Ground Fault Circuit Interrupter (GFCI)

The AC-110 volt circuit in the Westfalia conversion consists of an outside electrical cord connector, a 15 amp circuit breaker, one duplex mounted below the rear table, and one duplex inside the cabinet below the stove/sink (that's where the fridge plugs in).  The original brown bakelite was cracked and chipped, so I made plans to upgrade.

The GFCI mounted in the proper Euro fashion
It has a tiny LED showing when you're connected to the grid
Black and red buttons are for testing and resetting
The lower plate contains the 15 amp circuit breaker
A GFCI monitors current flowing from hot to neutral, and disconnects the power in about 1/30th of a second if it's imbalanced.  They are required by electrical code in damp areas because in case of a short circuit, you could become the path to ground especially if you are standing in, or have your hands in water which conducts electricity readily. They can prevent a fire, and/or keep you from getting burned, shocked, or electrocuted in situations like a broken cord shorting out, or your curling iron falling in the bath.

Since camping with Westly often includes some type of wet inside and out, it seemed a logical choice to add one.  Because of the circuitry inside, the GFCI tends to be a little deeper than a standard duplex.  I added a deeper utility box to accommodate it (remodel box from Ace Hardware) and new white vinyl plates for the duplex and the circuit breaker.

Seat Back Backpack


Really just an old day pack that was sitting around.  I hung it on the back of the passenger seat where it serves admirably holding a litter bag, first aid kit, extra batteries, coloring books, TP, in short a lot of stuff that we would otherwise be constantly searching for all over the dash, floor, seats, squirreled away in some bin somewhere.  It also detaches easily to use for it's intended purpose.

See more modifications here...

Tuesday, March 27, 2012

Ike Kinswa State Park

For those of you who don't live in Seattle, I'll let you in on a little secret - many cities in the US get more average rainfall including Houston, Miami and New York.  But, Seattle has many more actual days of precipitation!  Seemingly endless days of 45-50 degrees f , clouds and drizzle from October through April broken only by an occasional snowfall and rare sunny afternoon are enough to send even the most resilient moss-back into a blue funk.

Typical fall/winter/spring day in Seattle - drizzle and uniformly gray
About half way through the dark season, many find it becomes imperative to get out. Hawaii, Mexico, or the Caribbean could be good choices if you have the time and money.  For me, just a change of scenery does the trick.  Hanging out in a rain-saturated forest rather than my rain-saturated back yard is a wonderful morale booster.  And if walking on a cold beach where you don't dare approach the near frozen water, with blowing sand stinging your face and lodging in your lacrimal sacs doesn't make you feel alive, then I'm at a loss to know what would.

One fine weekend in January, Van Kid and I decided we needed to get out and do some camping  so we boarded Westly and departed ever-gray Seattle.  Our destination was Mayfield Lake.  One could drive on Interstate 5 south to Centralia, then US 12 east to Mossyrock to get there, but Westly urged us to keep to the blue highways.  So it was that we followed Hwy 167 through the contiguous suburbs south of the city, merged to 512 at Puyallup (in the Puyallup Tribe tongue - "the generous people"), then headed south/east on Hwy 7 at Parkland.  Hwy 7 leaves the valley, making a slow climb into the foothills alongside Alder Lake, a reservoir of the Nisqually River Project providing hydro-electric power to Tacoma.  There are several camp grounds along here, but we continued on to Elbe (you can stay overnight here in a caboose), where 7 jogs south again (continuing east will put you on State Route 706 to Longmire at Mt. Rainier National Park - that's another trip for later this year).  Hwy 7 winds along to terminate at the old mill town of Morton which once boasted the worlds longest railroad tie dock.  From there, US 12 west leads to Mossyrock, named after a big mossy rock (go figure).  Just west of downtown, Harmony Road (Hwy 122) brought us to...

Ike Kinswa State Park

It was originally called Mayfield State Park when 2,250 acre Mayfield reservoir was established by the construction of Mayfield Dam in 1963 (supervised by Boss Mayfield?).  It was re-named Ike Kinswa in 1971 to honor a leader of the Cowlitz Tribe.  The tribe lived in the area, and had their sacred burial ground in the valley that is now flooded by the reservoir.  The campground is located on a wooded point with some 46,000 feet of shoreline.  But all the lake-side camp sites were closed due to trees and branches that had fallen during a heavy wind the week before.  We selected a site away from the lake and were the only campers there, except for 5th wheel rig of  the campground host who was away when we arrived.


View Larger Map

The sky was clearing when Van Kid and I hiked around the area for a couple of hours, then skipped rocks on the lake while watching the sunset.  I forgot to bring the camera, so took only a few crummy cell-phone pictures of which we sent a couple to Van Spouse (who prefers to stay at home with hot coffee watching chick-flicks rather than camping in January - can you believe it??).

Van Kid gets some rock skipping practice in
The campground host returned at dusk and came by to inform us we were required to pay the leviathan motor-home full hook up rate because of the site we occupied.  I explained that we were in that site because all the "primitive" sites were blocked off.  And, that we were not even making use of the water/sewer/electricity/cable/central vacuum/steam heat utilities that came with the site.  It was to no avail, we paid the full rate.  I really don't mind supporting the State Parks, feeling that those who are using them should be the first to do so.  The state of California is closing 70 state parks this year due to budget cuts.  Blogger Lucy and her companion Roxy are on a quest to visit all 70 before they close.  She always remembers her camera and gets some great pictures.

We made a small camp fire, ate some tortellini, looked at the stars, played some music, then read The Hobbit by kerosene lantern light before retiring for the night in sleeping bags buried under piles of blankets.

Night falls softly at Ike Kinswa State Park
Van Kid took the top bunk, but I lifted him down and closed the pop-top around 4 a.m. when wind and rain returned uninvited.  By daybreak the storm had moved on but the temperature didn't get the message and hovered around 30 degrees f.  We warmed up with oatmeal, eggs and veggie sausage, then set out on another hike in the bracing morning air.

What did the girl mushroom say to the boy mushroom?
I like you, you're a real fungi.
(yeah, I know "fungi" is the plural, it fits the picture though)
After a lunch of quesadillas, we broke camp and decided that as long as we were we should head west again on Hwy 12 (about 25 miles) to Randle, situated in picturesque Big Bottom Valley.  From "downtown" Randle (gas station, groceries, diner), Hwy 131 runs south for about 5 miles before it splits into a number of forest service roads.  These roads, with some paving, but mostly gravel and dirt, cover a large area bordered on the north by Hwy 12, south by the Columbia River, west by Interstate 5 and east by the Cascade range.  I've spent many happy hours exploring here in the past and am looking forward to introducing Van Kid to it's wonders which include an ice cave, Native American cave art, lava tubes, unparalleled views of Mt. St. Helens, Mt. Adams and Mt. Rainier and acres of wild huckleberries in season.  But not this time - as the elevation increased the amount of snow did as well.

The yellow sign says something about a one lane road ahead
Not the best situation for turning around when the snow gets deep
We reluctantly headed home keeping to the blue highways as much as possible and began planning our next trip.


Thursday, March 22, 2012

Westfalia Improvements - Part II

A few more inexpensive improvements / additions / modifications to make life on the road with Westly more comfortable.  I can't take credit for any of these ideas, having had precious few original thoughts in my lifetime.  I've seen them on other Westy's or on Westy forums online and copied them, or took the original idea and adapted it for my use.

Fresh Water Tank Drain
One useful feature of the Westfalia camper package is the sink.  It's a rather smallish sink, but big enough to hold a pan or regular size dinner plate and it comes in very handy for tasks like teeth brushing.  The sink has a small faucet with a switch that controls an electric pump.


The water is pumped from an 11 gallon tank, hidden in the depths of the side cabinets. The tank is filled from a port on the side of the van and it has a drain plug underneath.  It needs to be drained periodically to prepare for freezing temperatures, cleaning, and to empty between camping trips (unless you are one of the .5% of the population that enjoys having a plastic taste in your water - I think these are the same people who can bend their fingers over completely backward).  With the drain stub and the cap being plastic, the threads are easily stripped by cross-threading or over-tightening.  The cap for this plug has a metric thread and replacements run at least $10.  Westly's cap had recently been replaced by the PO so it was in good condition.  While I had the cap off for cleaning, I ran over to Ace Hardware and purchased a little brass valve commonly called a "petcock" (no idea why) and  a brass nut, round with a knurled edge made for holding lamp parts together.  I drilled a hole in the cap and the rubber washer (slightly smaller than the petcock thread),  threaded the petcock in and put the brass nut on the inside to hold it in place.  With the cap snugly back in place I can easily reach underneath and turn the T handle to drain.

Inside view
Cap in place underneath van
Just ahead of left rear wheel well
Gray Water Drain Valve
The system has no gray water holding tank.  The sink drains through a tube inside the van and a fitting underneath.  This fitting is a standard hose thread.  Regulations require that the valve be closed unless a catch container is underneath.  Westly's gray water drain valve was difficult to operate, requiring me to lay under the van to get a good grip.  I scavenged a more ergonomically designed valve from a defunct garden watering wand and attached a short piece (about 5") of hose cut off from a discarded washing machine supply line.  The hose can be removed, but it's flexible enough to not cause any problems down there so I leave it on and carry a one gallon milk jug which fits under it quite handily to contain any release of effluent.  We don't use all that much wash water while camping, but you could run a longer hose out to a larger container if needed.
Gray water drain valve and hose in place
Refrigerator Flue Vent Cover
As far as I'm aware, all Vanagon Westfalia conversions destined for North America came equipped with the Dometic RM182(a,b) refrigerator. It operates on the absorption principal which means is uses heat to remove heat (!) and so has no compressor.  It generates heat by using a propane flame, or a heating element operating on 12 (while the engine is running) or 110 volts (when plugged in to "shore power").  The waste heat is best removed from the inside of the camper, and is for the most part through an outside flue.  Operation and maintenance of the fridge will be the subject of another post, but if you can't wait, check this out.
The refrigerator flue (shiny circle)
The three boxes below are for connecting a water hose, connecting an extension cord
for 110 volts, and filling the fresh water tank
When the fridge is not in use, the flue should be covered to prevent entry of rain, leaves, bugs and so on.  A nice little plastic cap is available from several vendors which snaps into place.  Being the hands-on guy that I am, I elected to make my own.  I found a small stainless steel bowl at a local thrift store for $1.99.  I marked where I wanted to cut the bowl so it would just fit over the flue and surrounding rubber flange.  Then I took a length of 1/4 inch vacuum hose, split one side with a razor knife and pressed it over the sharp edge of the bowl with a little RTV to hold it in place.  I used some ridiculously low priced Harbor Freight tools to accomplish the task.

An angle grinder with cut off wheel clamped in vise
was used to make the cut.  Don't forget eye protection!
A threaded insert riveter was used to add a
10/32 nut to the flue cover.
The completed cover snugly in place.  A brass fastener goes in the
grommeted hole and threads into the nut on the flue cover.  
Lantern Hangers
These can be mounted forward, aft, anywhere there is a rain gutter.  They are surprisingly strong and can be used to hang all kinds of lights and other things like towels, wet swim suits, make-up mirrors, bananas (to keep them from bruising), etc.  I keep a couple of these hangers in the van.


They do flex a little depending on the weight of the object attached.  I've also seen an aluminum pipe used to reduce flexing, but with heavier weights the lip of the gutter will begin to bow out a little so be wary with that.  Warning!  Anytime you are hanging a light with a flame, test to make sure the support is better than adequate for the weight of your appliance.  You don't want your kerosene or propane lantern falling and igniting your van, campsite, acres of grassland or forest ... you get the idea.


PVC or ABS parts in either 1/2 or 3/4 inch:    Slip T
                                                                      12 inch (or so) pipe stub
                                                                      Cap
                                                                      1/4 inch stainless loop

Use threaded or slip on the stub and cap, if you have the glue, the slip goes together easier.  Before attaching the cap, drill a hole and bolt the loop in. Use a large screw driver to open the loop.  You may want  to file or polish the sharp edges after you open the loop.  You can also leave off the cap and loop and just cut a notch on top of the pipe near the end but I think the loop is more secure.

I used a cut off wheel in an angle grinder (see picture above) to cut the slot.  The slot should be around 10-12mm wide which is just enough to slip on and off the gutter but still provide a good grip surface.  Where on the T-fitting the slot is cut determines the angle at which it will rest - I cut about 15 degrees off center.  I picked up a nice supply of these fittings at the Habitat for Humanity Surplus Store in Seattle for $1 a pound.
   
The Loo
What can I say?  We don't always travel with it, but when you need one, it sure is convenient.


This is the Thetford Porta Potti model 135.  I keep it in large old-time flour sack which hides it and drops open as shown.  It carries it's own fresh water supply which is pumped into the bowl with a bellows arrangement.  It also doubles as a little seat and is light enough to move around easily.  One drawback for guys is that it has a small, shallow bowl which means sitting rather than standing to avoid a lot of splashing all over your kitchen and bedroom.  But that's what the great outdoors is for right? Also, I wouldn't recommend this for more than a couple of people because then you would be emptying it often, and trust me on this one, it's not a fun chore.  The large vinyl mat underneath was a few bucks at Big Lots and helps keep the carpet clean, particularly when guys insist on standing, or in wet weather camping.

See more modifications here...


Tuesday, March 20, 2012

Ruby's Delivers

I'm a kinesthetic style learner.  I can read detailed instructions and maybe eventually figure them out, but one good picture or better yet, let me watch you do it and I've got it.  Miss Peacock patiently tried teaching me music theory and sight reading, but it didn't take - however, listen to a piece a few times and I can usually play it on keyboard or guitar.  I can figure out by estimated MPG and odometer reading how far a given vehicle should be able to travel before re-fueling, but seeing exactly where the needle is pointing when it runs out really drives it home for me.  My Outback will happily roll on another 100 miles or more after the needle points to E.  Not so for Westly.

The point where Westly's tank runs dry
The thick mark just right of center indicates about 10 gallons used of the 15.9 gallon capacity
After Van Kid and I left the Spring Cruise-In at XXX Root Beer Drive-In in Issaquah, we continued East on I-90 toward Snoqualmie Pass.  I wanted to test Westly's mettle after having done some fine tuning on the injection pump and Van Kid wanted to play in the snow.

Westly, making use of every one of his 68 ponies, was willing to charge up the grade at 60 mph, but I backed off to 55 to keep the oil temperature down to a reasonable 230 degrees f.

We didn't have tire chains, so followed a forest service road before the summit as far as the plow had gone, parked and hiked in a short way.

The end of the road
Van Kid checks out a freshet

Time to hit the road

But first, a snack
After becoming thoroughly chilled (not really having dressed for the snow), we had a snack, then headed west and stopped at  Snoqualmie Falls .  This time of year, a lot of water is going over this 268 ft falls (as opposed to being diverted for hydroelectric purposes). The trail down to the base of the falls was closed for repairs, but we had a grand view of the falls from the observation deck.  From the falls, we continued on Hwy 202 toward Fall City, then cut over to Preston and returned to I-90.


Lots of mist comes up from the falls to obfuscate the lens
Just past exit 20, Westly hiccuped, continued on another couple of hundred feet, coughed, then shut down.  I steered to a turnout on the right and hit the switch for the 4-ways.  One thing I like about the older diesels is their simplicity - no ignition system to troubleshoot.  Barring some major engine catastrophe, which I was pretty sure had not taken place, there is either fuel or not. - if there is not, it doesn't run.  Lots of air was visible in the line, so I could see right away the injector pump wasn't getting fuel.  I didn't initially think the tank was dry because the needle was not yet buried in the gauge.  I figured maybe the fuel level had gotten low enough to pick up a bit of muck from the bottom of the tank, so I proceeded to drain the fuel filter.  It has a little valve underneath which makes this an easy task.  Just a dribble.  Now I thought perhaps enough muck had been pulled up to clog the filter.  I always carry an extra and could easily swap it.

Help!
Of course I had in mind that we had joined AAA Washington last fall, but I'm a hands-on kind of guy, so I gave it my best before calling for assistance.  We had selected the Premier level membership which allows towing of up to 200 miles, no charge for fuel delivered and other useful (if you have the bad luck to need them) benefits.  AAA, to it's credit, considers the Westfalia camper to be a passenger van rather than a motorhome which keeps the annual fee reasonable.  When it was all over, I figured this episode alone would have cost at least 1/2 of the membership fee if paid out of pocket.

After messing around with the filter, the engine still wouldn't start and the battery was beginning to weaken so I finally did call.  The operator was very thorough and gave me a choice - either have fuel delivered, or a flat bed could come and take Westly to my choice of locations (including home - about 25 miles).  I liked having these options, and chose the fuel.  Within a few minutes, Doug from Ruby's Towing in Issaquah called and gave me the same options, adding that I could have fuel in 15 minutes, but the flat bed might not arrive for an hour or so.  Van Kid was excited about riding in a tow truck, but again I chose the fuel.

Ruby's delivers - Thanks Doug
Fifteen minutes later, Doug showed up with four gallons of diesel fuel ($18.20 worth).  He dumped it in the tank and hooked up jumper cables to provide a little boost.  After some cranking to fill the lines and filter, and a fit of spluttering, Westly's engine roared to life with a brief puff of sooty smoke.  We thanked Doug and continued on our way.  If you ever need towing or other assistance along I-90 in the vicinity of Issaquah, I highly recommend Ruby's Towing (425) 391-3867.

Now, this is unusual for me, but mind if I rant for just a minute?  We were at the side of the freeway for over an hour with the flashers on , the back hatch up and the engine cover off.  During that time among the thousands of cars and trucks that passed by in our direction were three vanagons, including one Syncro Westy with skis on top and no one stopped to offer any help.  Sure, this time I had it under control and didn't really need more help, but what if I was stuck somewhere remote like Bummerville, CA?  Would anyone stop to at least say "Hi, nice van - uhh...why is that big puddle of oil underneath?".  Isn't that in the unwritten code of ownership?  C'mon, where's the love, man?  This served to strengthen my resolve to always help out another stranded Vanagon or classic air-cooled driving Sister or Brother.

See you on the road...


Monday, March 19, 2012

NW Volkswagen Club 2012 Spring Cruise-In Pictures


2012  Spring Cruise-In presented by the Northwest Volkswagen Club
Held at the XXX Root Beer Drive-In on Gilman Blvd in Issaquah

2012 Fall Fling
Sunday, October 21, 2012
Same location

Friday, March 16, 2012

Westfalia Improvements - Part I

The Westfalia conversion is a wonder of spatial efficiency.  The engineers packed a lot of useful features into a very compact area.  But it's not perfect.  There are small pockets of wasted space, and some features that the engineers either didn't think of, passed off as economically unfeasible or perhaps too suited to individual needs rather than the camping populace as a whole.

These are a few additions / improvements I've made to Westly so far.

LED Lights
Older Vanagon campers like Westly came equipped with a single incandescent bulb fixture mounted above the stove/sink area.  This very bright lamp illuminates the work area well but leaves other areas such as the top bunk in dismal shades of grey.  In addition, you are sure to see spots for awhile if you look directly at it, especially if you have recently been outside in the gloaming or pondering the embers of a camp fire.

I wanted to add more light, but didn't want to run wires all around the interior, so I decided to try battery operated LED lights.  I picked up a three pack of puck lights at Harbor Freight.

The little round white circles are the lights
These spin, pivot and have two light levels. The five LEDs are supposed to last 100,000 hours.  They come with a sticky-back hook & loop fastener.  I put one up in the cab area, one in the pop-top (had to glue this one up as the adhesive wouldn't stick to the fuzzy lining), and one by the back hatch.  I later added a different type with 6 LEDs over the sliding door.


The light bar on that one swivels so it can be aimed inside or outside.  Yes, it is a lot of  AAA batteries (3 each) but they do last a surprisingly long time.  And, the harsh bluish/white light is far from my favorite color temperature, but I get used to it after awhile. While no one is going to perform surgery under these lights , they do the job, and the investment was small.  As you can see, these were a compromise of price and convenience until I come up with something better.  My favorite outdoor light for camping is from a kerosene lantern, but that's not always the best choice inside a small, closed area.

Kerosene lantern on ABS pipe hanger
Can you tell I took all these pictures on the same gray, rainy day?
Marine Fire Extinguisher
The Westy came with a 5-B:C fire extinguisher mounted just inside the sliding door behind the front passenger seat.  This being a very important piece of safety equipment (especially when you are using things like kerosene lanterns), I figured that after 30 years it might be time for a replacement.  I chose a First Alert FE10GR model, rated for Class B: grease, oil, gasoline, kerosene and other flammable liquids and Class C: small fires in live electrical equipment.
Always accessible,  inside or out
Also accessible is the hand sanitizer, held to the wall by velcro so it doesn't get lost
It's refillable, and the white color is highly visible.  It is slightly larger than the original, so I had to drill a new hole for the mounting bracket.  The new bracket handily covered up the original hole.

Some important points to remember about fire extinguishers:
    Mount securely in readily visible, easily accessible location.
    If it has a gauge, needle should be in the green area.  No dents or corrosion.
    Don't test! Replace or refill after any discharge, no matter how small.
    When using, stand back and aim at the base of the fire.
    Be wary of the effects of heat and smoke.  If you're not up to the task, get out!
    For small fires only - if not immediately successful, get away and seek help!
    Replace at least every 10 years even if it's never used.

Portable Solar Panel
Some day Westly will have a large solar panel array mounted on the roof.  Until then, I use a low-power portable panel that I've had around for a number of years.  It's amorphous silicon cells have a maximum output of 70 milliamperes.
The ICP #04041
I recommend spending your hard earned money on something better
The top hinges open and has a prop to maintain maximum exposure angle.  Inside, four AA or AAA batteries can be charged, or it plugs into a lighter receptacle to introduce a microscopic charge to the van battery.  I also have a variety of adapters so it can be used to charge personal electronic devices. Placed on the dash (or roof when not driving) on sunny days, it works excruciatingly slowly.  I also carry a small hand crank dynamo with a USB port. That recharges devices like cell phones much more quickly.  Of course, I could just recharge the phone and batteries off the van battery, but generating energy from sunlight is more fun and saves the van battery for more important things like starting the engine when it's time to go home.

Update 05/12

I finally ditched the old ICP solar charger in favor of the GoalZero Nomad 7m.  The monocrystalline structure, rated at 7 watts is more efficient that the old panel at converting sunlight to electricity.


The Guide 10 Plus Adventure Kit came with eight NIMH batteries - four each AA and  AAA and a flexible led lamp that plugs into a USB port. Phones, Ipods, Kindles, GPS's and other small devices can be charged directly from the solar panels under full sun conditions, or from the battery packs. There's also an adapter for cords with the vehicle lighter type plug end.


The panels are attached in a flexible cover that folds and fits in the glove compartment.

I've had good results placing it on the dash, or hanging it outside.  It weighs about one pound, and can hang on a backpack for charging while traveling on foot.


If you look at the reviews, you'll see some people have had issues charging their particular devices.  I haven't had any problems, but you might want to check that out before you decide to purchase a charger like this.  Some day, maybe we'll have more universal battery/charger standards.  


Indoor/Outdoor Thermometer
This little instrument keeps track of high & low temps.  I usually keep the wireless outdoor sensor inside the fridge to get an idea of what the temperature extremes have been (in the interest of food safety).  It's easy to place outside also, remembering to put it away when breaking camp.  I added a visor clip from an old garage door opener remote to the back so I could hang it in various easy to see places.


This particular model was very cheap, and has just enough memory to keep track of high/low temps for a week.  I may upgrade to a more robust model with barometric pressure, relative humidity, moon phases, sunrise/sunset, tides, excerpts from the Farmer's Almanac, etc. because I like to know these things.  Then again, I'm sure I could get all that with a smart phone app.  Now, if only I had a smart phone...

See more modifications here...


Thursday, March 15, 2012

Westly's Specs

Some information I've collected about Westly.
Probably more than you ever wanted to know, but here goes:

> Manufactured in Hannover, Germany March, 1982
> Camper conversion done by Westfalia-Werke in Rheda-Wiedenbrück, 
    Germany July, 1982.  It was imported to the U.S. arriving at Terminal Island,
    a facility shared by the ports of Long Beach and Los Angeles, CA.


> Drivetrain configuration - rear engine, rear wheel drive (2 wheel drive)

> Engine - 1.9 liter inline four cylinder diesel   1Y - manufactured in Mexico
                 Normally aspirated (non-turbo)
                 Mechanical fuel injection
                 Bore 79.5 / Stroke 95.5 / Compression Ratio 22.5:1 
                 Horsepower 68 @ 4400 RPM / Torque 95 ft/lbs @ 2500 RPM
                 Redline 4600 RPM
                 Oil Pressure:
                 60-80 psi cold / 30 psi @ 2000 RPM, 220 deg / 5-10 psi idle, 220 deg 
   * Note:  Original engine was a 1.6 liter 48hp diesel
                The current 1.9 liter was installed 12/2002


Listen to Westly's engine purring, complete with squeaky alternator belt


> Cooling system capacity - 4.2 U.S. gallons
   Radiator core size 22.5" X 17.25" X 1.625" / Hose size 1.25"
   2-Speed electric auxiliary cooling fan behind radiator


> Fuel Type - Diesel #2 or B5, B20, B99 Biodiesel
> Fuel capacity - 15.9 U.S. gallons
> Fuel economy - Mixed city/hwy - 26mpg
                            Hwy @ 45-55mph - 30mpg
                            Hwy @ 60-65mph - 23mpg  


> Transmission - 091 DZ 
   Gear Ratios:    1st gear 3.78
                           2nd gear 2.06
                           3rd gear 1.26
                           4th gear .85
                           Reverse 3.67
                           Transaxle Final Drive 5.86


> Suspension, steering, brakes
   Independent front & rear coil spring suspension
   Rack & Pinion steering
   Power assisted brakes - 10.9 " front discs, 9.9" rear drums


> Wheels & Tires (stock size)
   Steel wheels / 14" diameter / 5.5" wide / ET35 / 5X112 bolt pattern 
   Lug nuts/bolts 14mm thread / 19mm head / 130 ft lbs torque
   Nexen 185R14C LT - Load range D / 8 ply rating 
   Capacity - Single 1875 lbs @ 65psi
   Revolutions per mile: 809
   Go Westy hubcaps (hey, they came with the wheels/tires)


> Dimensions / Weight capacity
    Length - 179.9" / 14.99'
    Width - 72.6" / 6.05'
    Height - 80.7" /  6.73' (with Westfalia Pop-Top closed)
    Ground Clearance - 7.5"
    Front/Rear Track - 61.8"
    Turning Radius - 34.5'
    GAWR Front - 2425 lbs
    GAWR Rear - 2866 lbs
    GVWR - 5292 lbs dry

>Color:  LH8B - Assuan Brown
> Interior: KW - Van Dyck (seat upholstery & curtains)


> Model Trim L includes: 
    Dual outside mirrors
    Sliding side door
    Sliding side windows
    Opening wing windows
    Tinted glass
    Rear window defroster
    Two speed / intermittent front windshield wipers
    Padded dash board
    Instrument cluster with speedometer, odometer, fuel lever, 
         water temp, analog clock
    Heater/defroster/fresh air circulation with 3-speed fan & rear outlets
    Two 12 volt outlets
    Radio with 4 speakers


> Westfalia Conversion includes:
    Front bucket seats with swivel bases, cloth/vinyl covering
    Rear bench seat folds out into bed with storage underneath
    Seat belts for four, front shoulder belts
    Hanging clothes closet with mirror inside door / rear storage compartment
    Clothes locker with three compartments
    Overhead storage compartment with useless cargo net
    Stainless steel sink / 11 gallon fresh water tank / electric pump and faucet
    Two burner propane stove with stainless with fold down splatter shield
    2 cubic foot refrigerator operates on propane, 12 volts or 110 volts
    3 gallon propane tank
    Information panel showing battery charge, fresh water level, fridge on
    110 volt duplex with 15amp circuit breaker
    12 volt overhead light
    Two stow away tables, front and rear (Westly's front table is missing)
    Curtains all around, including front windows and windshield
    Snap-in bug screen for rear hatch
    Fiberglass pop-top with canvas sides, front zipper window with bug screen
    Fold out double bed in pop-top
    Cargo carrier with tie down loops on roof

    
> Some modifications I've made:
    Extra gauges
    Engine block heater
    Larger oil/water heat exchanger 
    1.5 amp 3-stage on board battery charger
    Variable delay windshield wiper relay
    Valve to control heater flow
    Switch to manually engage auxiliary cooling fan
    PO added heavy duty tubular bumpers, front & rear


> Some modifications / improvements specific to the camper:
    Battery operated LED lamps
    Marine fire extinguisher
    Portable solar panel
    Added valve to fresh water tank drain cap
    Added valve and hose to sink drain
    Added T in propane line to use disposable 1 lb bottles if tank is empty
    Cover for refrigerator flue vent
    In/out wireless min/max temp gauge
    Stove/sink exhaust fan
    Plexiglas sliding window rain shield
    Rear table height extension
    Stand to use table outside - hooks into side jack point
    Replaced 110v outlet with GFCI duplex
    Waterproofed pop-top canvas
    Shadyboy awning


>  Technology
    Westly is a computer-free vehicle by birth. 
    I usually carry a cell phone, a GPS,  and a Kindle Keyboard.
   
>  Improvements I'd like to make in the future:
    15" wheels / tires
    New shocks & springs
    Extra battery for camping
    Solar panel to charge the extra battery
    Skylight in pop-top
    New three-window pop-top canvas
    Hella 500ff driving lights
    2" receiver on rear for bike rack
    Upgrade radio & speakers


>  Karma


    Just for the record, Westly was not named after the GoWesty mascot.  In fact, I was mortified to discover they had such a thing and that I might be accused of being so un-original as to emulate their cagey bruin.  He was in fact named after the son of a good friend of mine, but once you bestow a name you can't very well take it back.