That being said, an all original bone-stock Transporter (granted, it was restored to "better than new" condition) can bring a good price, as one 1963 model did recently, selling at an auction for an astounding $198,000.
But that's not Westly, so here are a few low cost additions and modifications I've made so far. Nothing major here so I hope your're not disappointed.
Sticky Pad
Older Vanagons have a painted metal dashboard with a padded lip out front. The lip usually keeps things from falling on the floor, but anything up there will still be in motion during every turn. I've seen a cell phone skate across the dash and right out the window.
This little pad goes on the dashboard, or anywhere else you want to keep your phone, i-pod or other items in place.
 |
| The Sticky Pad in action Also visible - our mascot: glow in the dark Senor Tortuga Lenta |
Update: After about a year, the sticky pad gradually became the overly-sticky pad, holding on to objects much too dearly and leaving them with tacky stripes when they could finally be wrenched away. Now it's history.
On-board Battery Charger
High compression diesel engines require a tremendous amount of cranking amps to get started, particularly in very cold weather. I had already installed an engine block heater which preheats the water (and oil to a lesser degree, by conduction) for easier starts, but it still helps to have the battery is top condition. This is generally not a problem on the road, but around town with lots of stops and starts, particularly during fall/winter when the lights and heater fan are often on, an occasional top-up charge is helpful. Gas powered Vanagons keep their starting battery in a compartment under the front seat. In the diesel Vanagon it's back in the engine compartment. I suppose this is so the cable runs can be shorter, resulting in less voltage drop, but I'm not sure. Anyway, I purchased a 1.5 amp 3-stage charger which is designed to mount in the engine compartment and be permanently attached to the battery. The first stage is a low, constant current to bring up batteries that are discharged. The second state is a higher current to top off batteries that are almost fully charged and the third stage is a floating charge that keeps the battery fully charged without overcharging.
 |
| On-Board battery charger |
Variable Delay Windshield Wiper Relay
The L trim level Vanagon comes with an intermittent wiper delay that's preset to swipe every 5 seconds or so. Many later Volkswagen cars came with a variable delay feature, and someone figured out that you could take the wiper relay from those cars at the wrecking yard (or spend a week's pay for a new one) and plug it right in taking the place of the standard Vanagon relay. Even better, if your Vanagon was not originally equipped with a wiper delay, you can break off a little plastic tab in the switch so it will go into that position, install this relay and have it all.
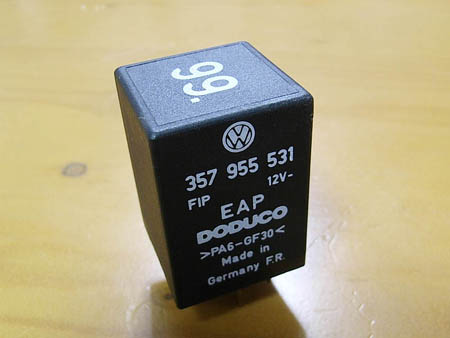 |
| It's called the 99 relay because of the number printed on top |
Valve to Control Heater Flow
Water cooled Vanagons have a little issue known as Hot Foot Syndrome. There are two causes. First, the radiator is in the front of the van, directly ahead of the passenger compartment. Radiators cool the water that is flowing inside by using air to conduct the heat away. The hot air then has to go somewhere. In the Vanagon, it passes through a cavity behind the radiator, then is directed down and away under the van. That cavity is adjacent to where the driver has a foot on the accelerator pedal, and a passenger might rest their foot on the other side. The heat conducted through the metal floor pan makes a great foot warmer in winter, but the rest of the year it can get a little uncomfortable. The other part of the problem lies with the stock heater control. Evidently, for whatever reason most do not shut off completely, allowing hot water to continue to circulate through the heater core, thus heating any air that comes through. So, if you want fresh air blowing through the vents, it will always be heated a little. Again, great in cold weather, but not so much any other time. Here's the fix: First, adhesive backed foil insulation is applied to the cavity area to keep the conducted heat level down. You can put it inside under the carpet, or outside, or both. Westly has it outside and that seems to be enough, but then I'm in the Pacific Northwest, which is not exactly known for keeping the mercury elevated. Second, an additional control valve can be added to the water line between the engine and the heater core. Parker Hannifin makes a high quality ball valve that is very compact and simply shrugs at high water temperatures. The orange lever on the top turns 45 degrees to open or close the valve.
 |
| The Parker Hannifin MV609-8 Ball Valve with 5/8" barbs added, ready for installation |
 |
| The valve in place, next to the stock valve under the dashboard on the passenger side of the heater |
See more modifications here...
No comments:
Post a Comment